
If you’ve been curious about how to make acrylic earrings using a laser cutter, you’re right where you need to be. There’s something exciting about watching a plain sheet of acrylic turn into a pair of stylish earrings in just a few steps. No wonder laser-cut acrylic earrings have become a favorite among many makers because they’re lightweight, eye-catching, and super easy to create.
So, from picking the right acrylic to clean cuts and simple assembly, this guide keeps things clear, practical, and fun for you to follow. Stick around, you wouldn’t want to miss this.
Table Of Contents
How To Make Acrylic Earrings? A Simple Step-By-Step Guide
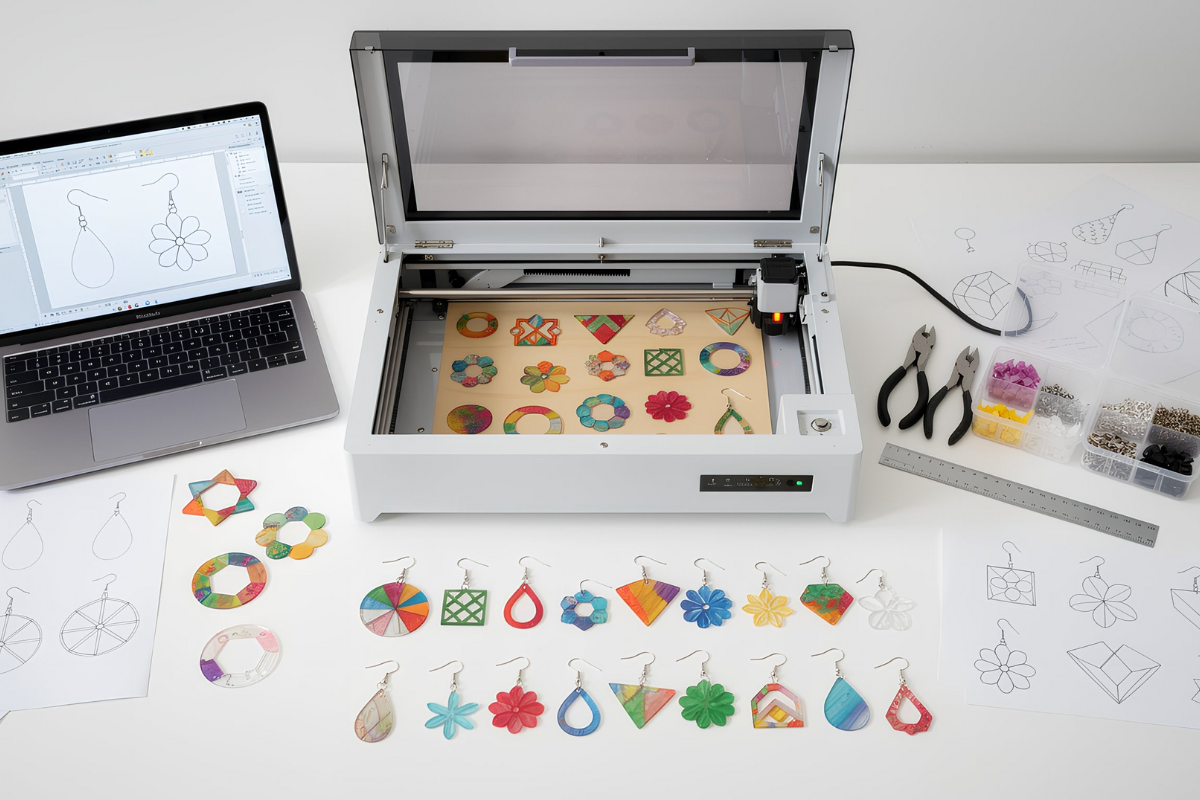
Here are the beginner-friendly steps to make laser cut acrylic earrings, explained in a clear and easy-to-follow way:
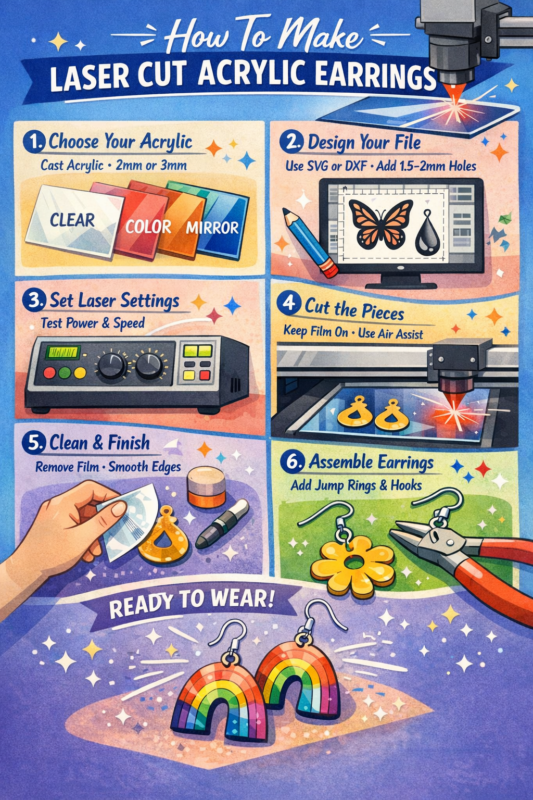
Step 1: Choose The Right Acrylic
Start with cast acrylic since it gives you cleaner cuts and smoother edges. For most earrings, 2mm keeps things lightweight and comfortable, while 3mm is a better fit for slightly bigger designs. Clear, colored, mirror, and frosted acrylic all behave a little differently when cut, so choosing the right finish upfront can save you a lot of trial and error later on.
| In short, the best thickness for acrylic earrings: 2mm (1/16 “): best for lightweight acrylic earrings and smaller designs3mm (1/8 “): sturdier, great for larger statement shapes4mm+ typically feels too bulky for earrings unless you’re working with tiny pieces |
Step 2: Create A Laser-Ready Design
Create your design using SVG or DXF files, and make sure small details are thick enough to stay strong. Keep earring holes around 1.5–2mm and place them a few millimeters in from the edge so they don’t crack later. Clean, balanced designs usually cut better and give you a smoother finish overall.
| Pointers to prevent cracking:Hole diameter: 1.5–2mm works well for most jump rings.Keep holes at least 2–3mm away from the edge of the acrylic.If the design is heavy, use a slightly larger hole and sturdier hardware to reduce stress. |
Step 3: Set Laser Settings Carefully
Take a moment to carefully dial in the right power and speed so the acrylic cuts cleanly instead of melting. Always remember that smaller earring pieces need good airflow and sharp focus, or the edges can turn cloudy. It’s always smart to run a quick test on scrap acrylic before cutting your final design.
| Power, speed, and focus basics: Focus carefully, especially when changing acrylic thicknessUse enough power to cut through cleanlyAvoid excess power that can melt or cloud the edges |
Step 4: Cut The Acrylic Pieces
While making acrylic earrings, leave the protective film on if your acrylic has one. Use air assist and proper ventilation to reduce residue. If pieces don’t cut all the way through, a second pass usually fixes it without damaging the design.
| Air assist and bed setup during laser cut: Use a honeycomb bed or raised pins if you have them. This helps prevent marks on the back.Make sure your exhaust is strong, as less smoke buildup means cleaner cuts and less residue. |
Step 5: Clean And Finish The Edges
Peel off the protective film and give the surface a gentle wipe with a soft cloth. A little edge touch-up can improve how it looks, but thin acrylic doesn’t need heavy polishing. Handle the pieces carefully to avoid scratches.
| Finishing steps for acrylic laser cut earrings: Manual finishing is beginner-friendly and safer for thin acrylic, and light sanding or polishing is usually enoughFlame polishing looks great, but is easy to overdo, and too much heat can warp or damage thin pieces |
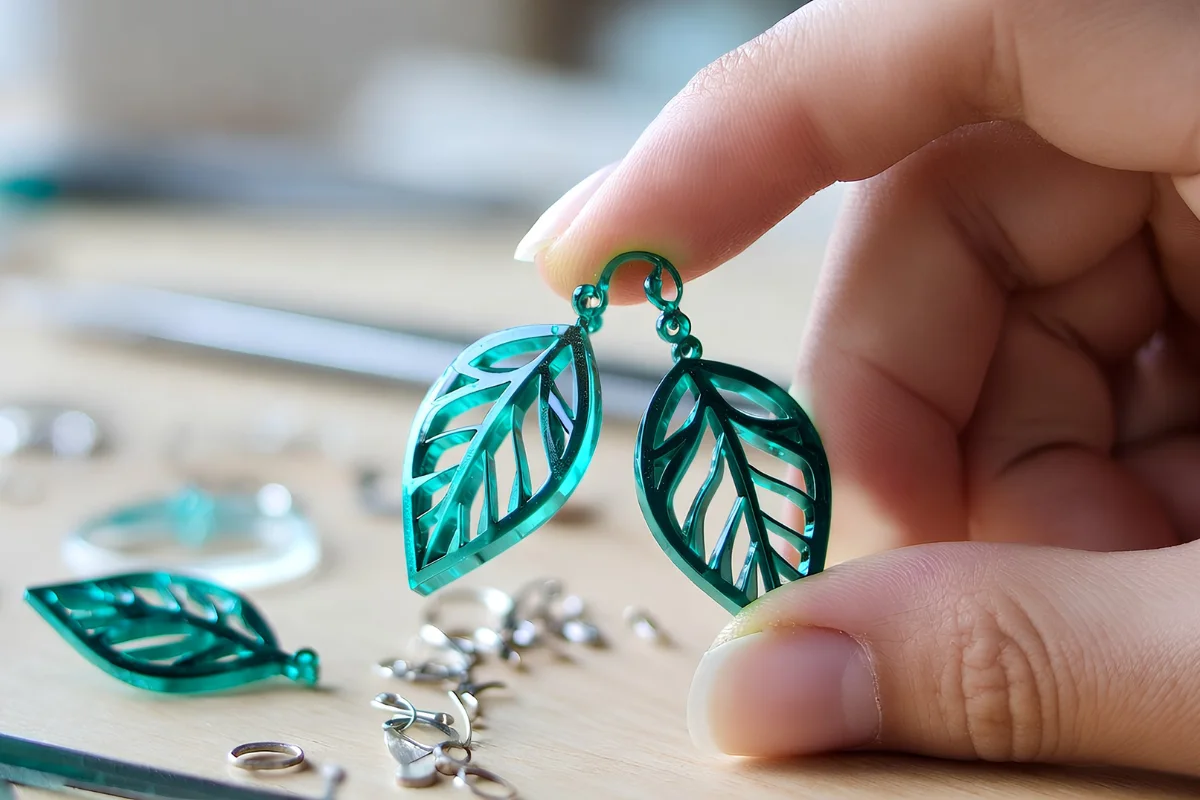
Step 6: Assemble the earrings
Attach jump rings and hooks with a steady hand, and open the rings sideways instead of pulling them apart. This puts less stress on the acrylic. Use smooth-jaw pliers to help prevent marks, and work on a soft surface to keep your design protected. And finally, once assembled, your acrylic laser cut earrings are ready to wear and flaunt.
| Assembly order to avoid stress cracks: Open jump rings sideways and don’t pull them apart front-to-back.Attach the jump ring to the acrylic first.Add any charm or layer of your liking.And lastly, attach a hook. |
Durability, Storage, And Care Tips
- Handle gently: Avoid bending acrylic near holes to prevent cracks.
- Store separately: Use pouches to reduce scratches.
- Keep away from heat: Heat and sunlight can cause warping or fading.
- Use clean hands: Oils can dull clear and glossy surfaces.
- Check hardware: Tighten or replace loose hooks and jump rings early.
Read more: How Laser Machines Are Revolutionizing Jewelry Manufacturing?
Wrapping Up How To Make Acrylic Earrings
Once you get the basics right, making acrylic earrings becomes a smooth and enjoyable process. With the right acrylic, clean laser cuts, and a reliable Acrylic Laser Cutting Machine, it’s easy to create pieces that look pretty, polished, and professional.
So, if you’re planning to turn this into a business, this widely used machine and easy guide can help you work more efficiently, stay consistent with your designs, and scale with confidence as you grow.
If you’d like to see the machine in action, check out our YouTube video.
Frequently Asked Questions
1. What are the common mistakes when making acrylic laser cut earrings?
The mistakes that may occur when making acrylic laser cut earrings include choosing the wrong acrylic thickness, placing holes too close to edges, skipping test cuts, using incorrect laser settings, handling pieces roughly during assembly, and storing finished earrings in a way that causes scratches or stress.
2. Can beginners make acrylic earrings with a laser cutter?
Yes, beginners can easily make acrylic earrings by using simple designs, testing cuts on scrap material, and learning basic laser cutting settings before moving to detailed shapes.
3. How long does it take to make a pair of laser cut acrylic earrings?
Once the design and settings are ready, cutting and assembling a pair usually takes only a few minutes. This process is highly efficient for small batches or custom orders.
4. Why are laser cut acrylic earrings good for small businesses?
Laser cut acrylic earrings are suitable for small businesses as they allow fast production, consistent quality, and efficient material use, making them practical for regular orders.
Explore the 10 Most Profitable Laser Cut Products That Rule The Market today.
2 thoughts on “How To Make Acrylic Earrings With Laser Cut”
Comments are closed.